Google & Linkedin API Configuration
Please follow the procedure.
-
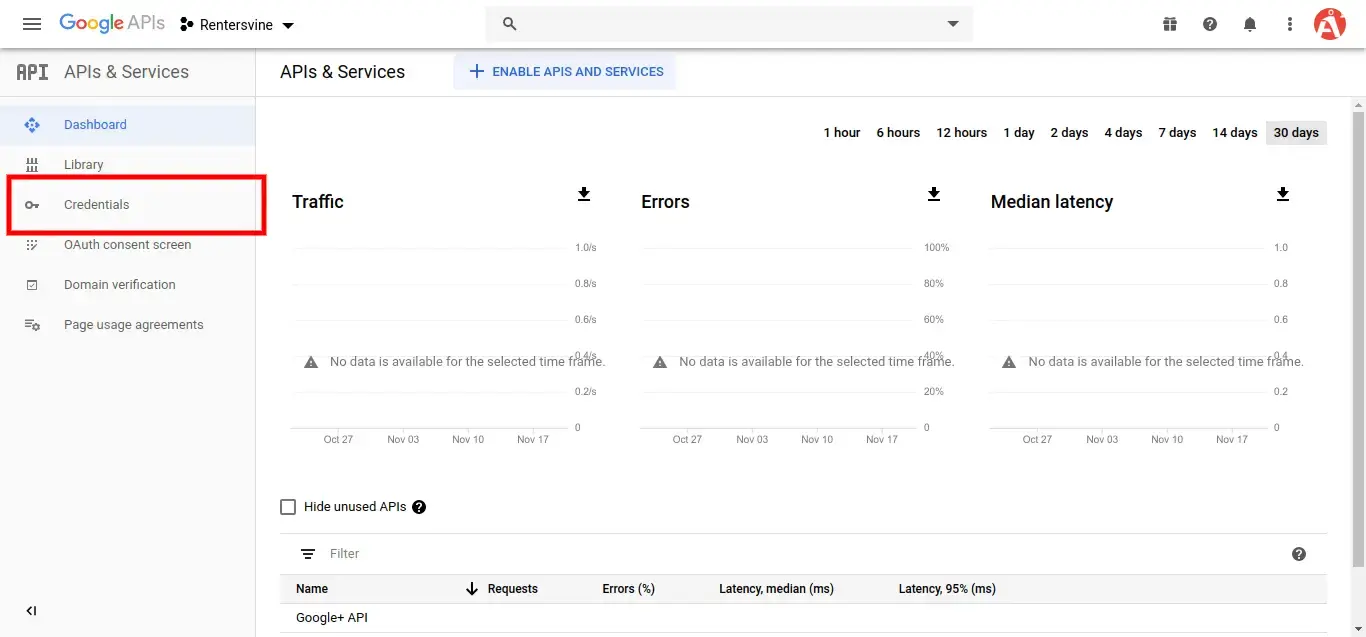
Credentials
In this step we need google client id and secret that way we can get information of other user. so if you don't have google app account then you can create from here Google Developers Console you can find below screen :
-
Now you have to click on Credentials and choose first option oAuth and click Create new Client ID button. now you can see following slide:

-
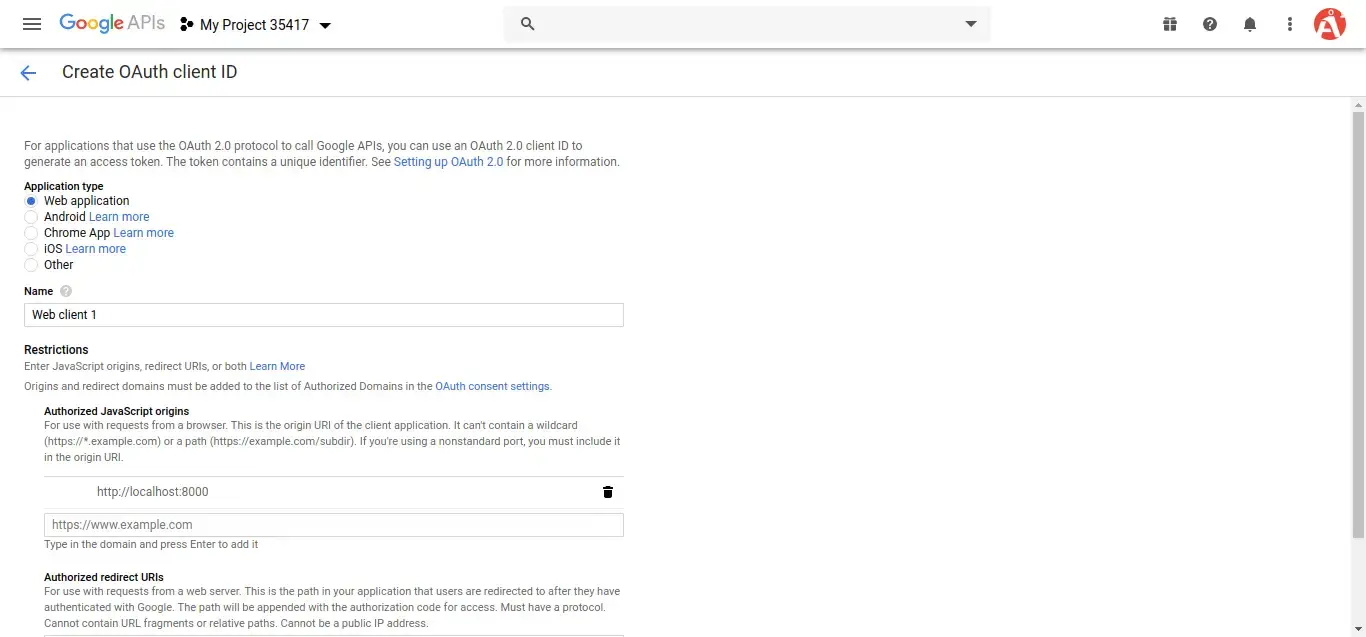
-
-
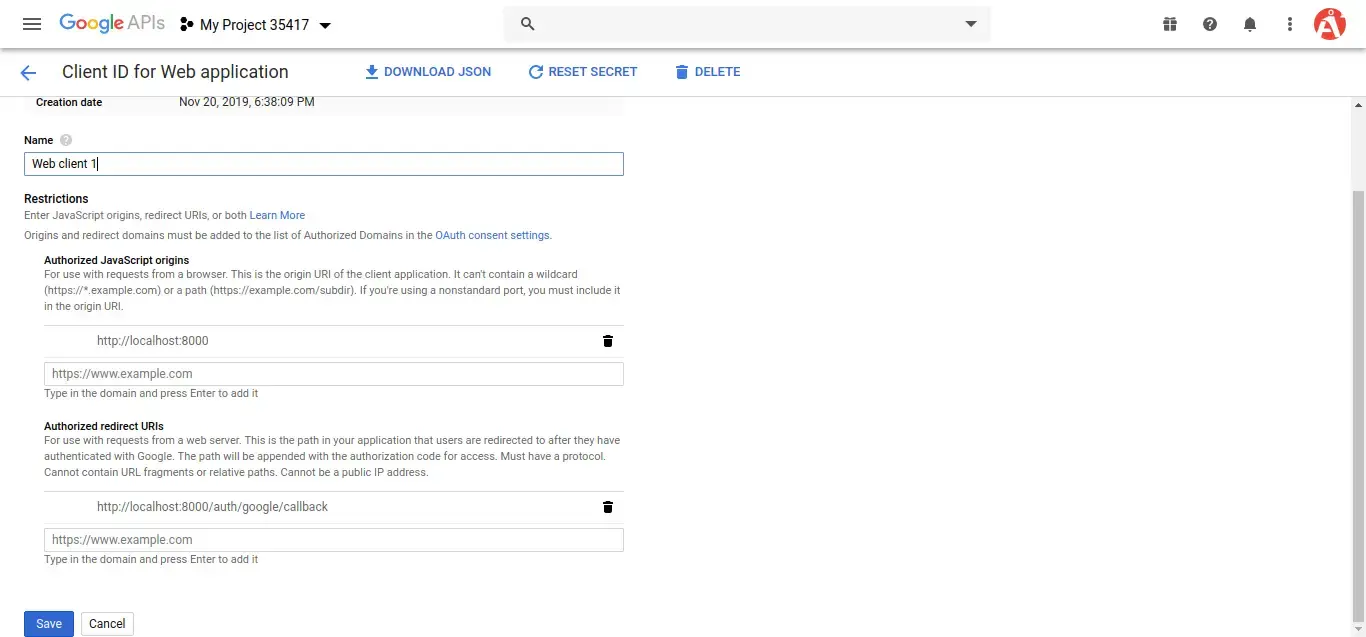
After creating account you can copy client id and secret.
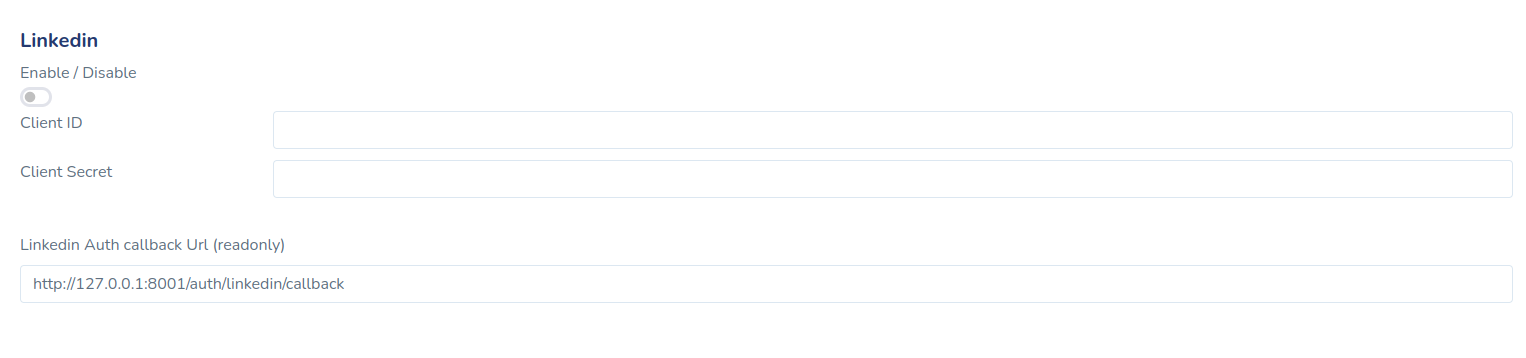
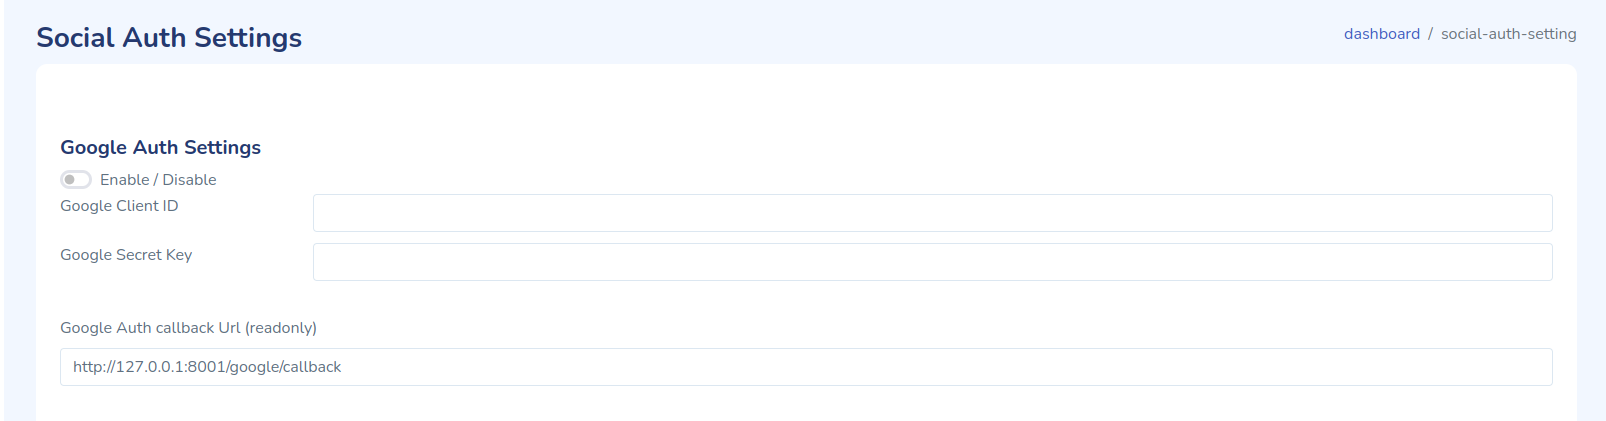
Now you have to set app id, secret and call back url in config file so open https://yourdomain.com/dashboard/social-auth-setting and set id and secret this way: https://yourdomain.com/dashboard/social-auth-setting
-
Linkedin Login
Before integrating linkedin login in Laravel 10, you need to have LinkedIn secret id and secret key. If you do not have the linkedin secret key ID, then you can get it by following the steps given below.
Step 1
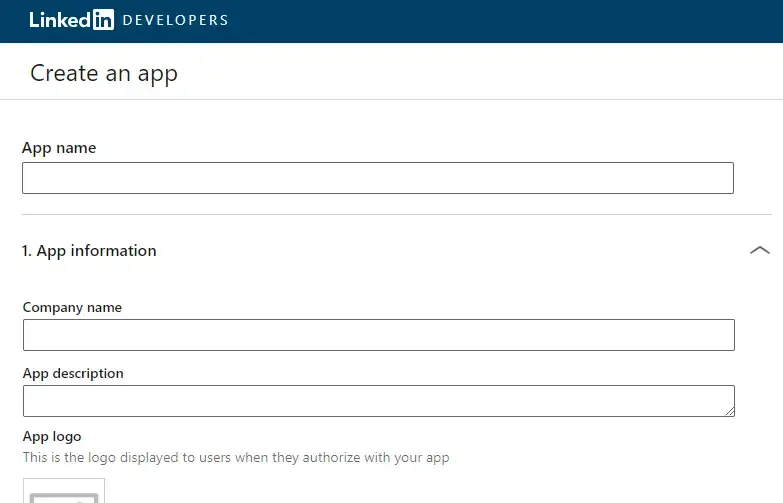
Create LinkedIn app by clicking the following URL:- https://www.linkedin.com/developers/apps/new.
And create a LinkedIn app.When you click the above given url the following below page will be displayed. So fill in the details and create your LinkedIn app:
-
Step 2
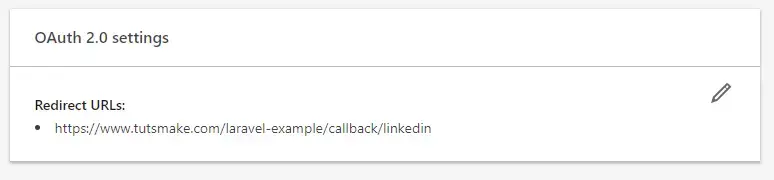
Once you have created LinkedIn console app. Then you need to set the redirect URL. for example:
-
Step 3
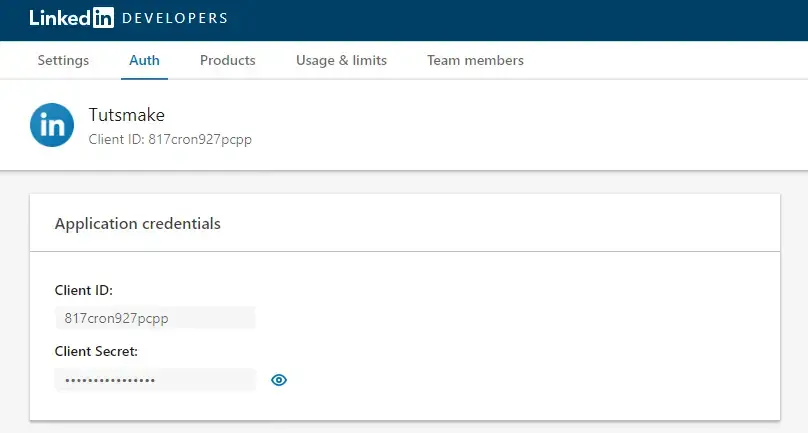
Finally, you redirect to the dashboard by linkedin.com. So you can copy client id and secret from linkedin app dashboard like following picture:
-
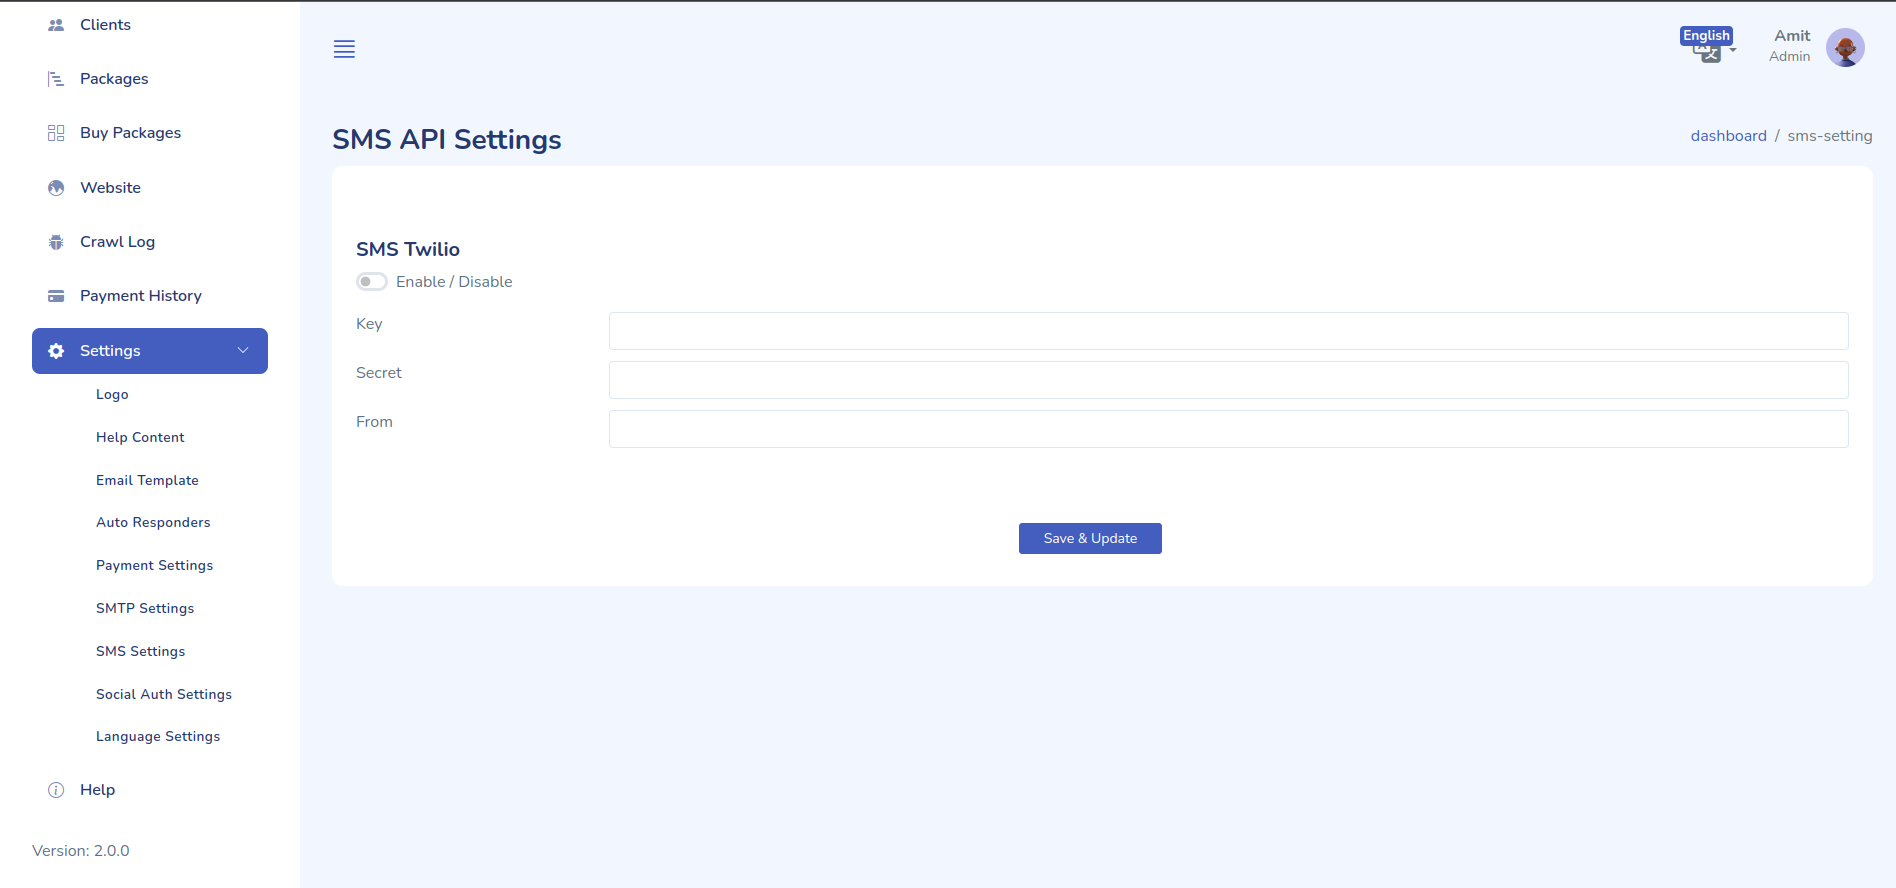
Configure SMS Notifications
To receive SMS notifications whenever a website or service you are monitoring experiences downtime or becomes accessible again, follow these steps:
Twilio Account Creation
- Go to the Twilio website: https://www.twilio.com/en-us
- Click on the "Sign Up" or "Get Started" button, typically located at the top right corner of the webpage.
- Fill out the required information on the registration form. This usually includes your email address, password, and phone number. Ensure that you provide accurate information.
- Verify your email address by clicking on the verification link sent to the email you provided during registration.
- Once your email is verified, you will be directed to the Twilio dashboard. Here, you may need to provide additional details such as your name, company name (if applicable), and any specific use case information.
- Review and agree to the Terms of Service and Acceptable Use Policy.
- Choose the type of services you plan to use with Twilio, such as voice, messaging, or video. You may also select specific features or integrations you are interested in.
- Provide payment details for your account. Twilio offers various payment options, including credit card or bank account.
- After entering your payment information, your account should be successfully created, and you will gain access to your Twilio account dashboard.
- https://yourdomain.com/dashboard Scroll down to settings and to SMS settings section and click to SMS API Settings.
- Enter your phone number.
- Review your settings and click "Save".
That's it! You are now set up to receive SMS notifications for downtime alerts and accessibility restoration. Stay informed and take immediate action to ensure the smooth operation of your online services.
Now the LinkedIn app has been created successfully. Now, you can start the integration of LinkedIn login
Step 4 – Setup Linkedin id, Secret and URL
In this step, configure Linkedin app with this laravel app. So, open your laravel Linkedin social login project in any text editor. Then navigate the config directory and open https://yourdomain.com/dashboard/social-auth-setting the dashboard and add the client id, secret and callback url: